I’ve Moved!

You knew it would happen sooner or later. I love this whole blog thing so much I decided to move it to a new domain so it’s easier to remember. So instead of being https://aerogardennewbie.wordpress.com/, I’ve moved to http://www.aerogardennewbie.com!

So please be sure to visit us there. I’ve transferred all the information from here to over there so you won’t miss a thing!

http://www.aerogardennewbie.com

Come check me out now!

How to Feed The Aerogarden Pro 100

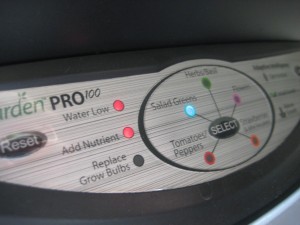
Sure enough right on cue two weeks after planting the Add Nutrient Light illuminates and it’s time to feed the Aerogarden.  So being an Aerogarden Newbie I

Add Nutrient Light

Add Nutrient/Water Lights

of course went to the instructions on how to add water and nutrients.  It’s interesting, both seed kits that I got from Aerogrow came with nutrient tubes instead of nutrient tablets.  I haven’t read anything about them switching from tablets to nutrient packs but thats what I’ve got.  Does anyone know when they changed this?

Anyway, so after searching around I discovered it was pretty straight forward and really simple.

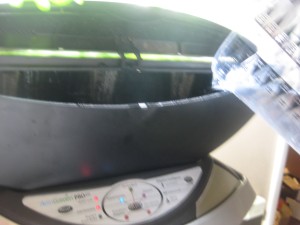
Adding water

Adding Water AG Pro 100

Adding water to the Aerogarden Pro 100 is as easy as lifting the hing in the front and adding water to the fill line indicator in the front/middle of the water basin.  You can’t see the fill line in this picture but it is a cylindrical tube near the from and center.  Inside the tube is a float ball that lets the garden know when the water is getting low.  This will become important later after I tell you about my Newbie mistake this week. LOL

So with the water filled, it’s now time to add the Nutrients.  With the Aerogarden Pro 100 the nutrient

Aerogarden Nutrient Pack

Aerogarden Nutrient Pack

pack comes in an 8ml tube.  The Aerogarden 6 feed packs come in 4ml tubes but there are enough to run the full course if you use the Aerogarden 6 packs in the Aerogarden 7.  The pack needs to be shaken well before use.  All the nutrients tend to gather to one side or the other so giving it a solid shaking before use is crucial.  I usually wait until the Aerogarden is pump is on so I know the Nutrient pack will be dispersed properly right from the beginning.

Aerogarden Nutrients

Aerogarden Nutrients

Cut the pack along the dotted line and add to the water basin.  After I dump the main contents out I usually fill the tube with a little bit of water to get any left over nutrients in the pack.   So with that being said it’s time to reset the nutrient timer.  This is important because it is a 2 week timer.

Which is where I ran into this week’s mistake.  In the instructions I had, it explained to press the reset button to reset the water and nutrient timers.  However I failed to either observe or comply

Aerogarden Reset

Aerogarden Reset

with the step of only pressing it and letting go, and I held it down for many seconds.  Within 5 seconds I had reset the entire memory on my Aerogarden so it now believes AG1 is back at its germination stage.  I need to look up how to fix this.

Do any of you know what to do in this scenario?  How do I set my lettuce back to its initial growth stage.  Please feel free to leave comments below.

I will post the results here soon.

Aerogarden Patience

Aerogarden Lettuce

Aerogarden Salad Greens

Well it’s been a week, let’s talk about the progress we’ve made.  In the first Aerogarden (AG1) we planted the lettuce from the space saver 6 due to counting our chickens before they hatched.  A week ago we talked about getting some little sprouts and how excited I was for the sprouts.  In just seven days we’re now looking at lettuce in it’s miniature form.  It really didn’t take much effort just plugging in the pods and starting the water, and finally adding the nutrients.  It really is fun to watch it grow right in front of your eyes.  Our children are learning so much about gardening also.

Now, even though the lettuce is sprouting nicely I’ve noticed what looks like little tiny brown

Aerogarden Lettuce Spots

Aerogarden Lettuce Spots

spots on some of the lettuce leaves.I cant seem to figure out what it is so did some Googling about it.  I was comforted when I came across a quick article on the customer service website that explained about the little brown spots.  The website states:

Do not worry if some of your lettuce plants begin to develop little brown spots on their leaves. Some of the varieties of lettuce in our kits are of a red-speckled variety, and when the speckling first appears, it looks like brown freckles. These lettuces will become quite beautiful as they mature.

With this in mind I’m finding that I’m getting really excited to be able to eat some lettuce from the first harvest.  I’ve found that the hardest thing to do is to leave the Aerogarden alone and let it do it’s own thing.  I just want to help it grow faster.  I don’t really know how but I want to speed up the process.  It’s silly I know, but that’s how excited I’m getting.  So that is the news from AG1.

Aerogarden Herb Kit

Aerogarden Herb Kit

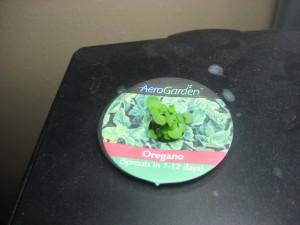
AG2 looks like it is struggling a little bit.  Now, in all honesty, I bought this Aerogarden from the classifieds.  I didn’t know how to clean it properly so I didn’t clean it at all.  Even though this is the first Aerogarden that was planted it seems to be falling behind in the race.  I was beginning to get a little frustrated as four of the seven herbs hadn’t even sprouted by the time allotted.  Just as I was about to call customer service I saw another one begin to sprout.Aerogarden Herbs My Oregano, Italian Parsley, Thyme, Basil, and Mint have begun sprouting but at an extremely slow pace.  The Mint didn’t begin to sprout until I turned it so the slit in the sponge was visible to the light source.

Being the impatient sort that I am decided to remove the sponge to take a close look at the Garlic Chives, and the Savory. Upon close inspection it looks like they will be sprouting very soon so I will give it a couple more days.

Aerogarden Mint

Aerogarden Mint

The mint was a tough cookie to wait for also.  Just as I was about report a dead pod regarding the mint.  Not to mention, I was always taught that mint was a weed.  even though you may love mint, it it really hard to get rid of it.  So I was excited about the mint beginning to sprout.  Essentially, I’ve been really having a fun and educational experience.  It was my purchase of the Aerogarden that really got me thinking about my approach to traditional gardening which we can cover in a later post.  So, until next time.  Keep growing!

Do you have any tips, stories or about your Aerogarden seeds not wanting to sprout?  If you do please tell us how you resolved it in the comments below.

The First Aerogarden Problem

The first thing that I did when I made the decision to buy and Aerogarden was consult with my wife. With her interest in gardening I knew it was a shoe in. Then I decided to look up the different garden types and decided on getting the 6 and the Pro 100. I bought the Lettuce Kit for the 6, and the Italian Herb kit for the 7. When I went to purchase the Aerogarden 6 I found a Pro 100 for a comparable price. So I bought it instead. The day both Aerogarden Pro 100’s arrived I was really excited and I began planting right away.

The Aerogarden Seed Pod

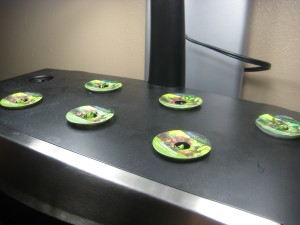
So, how do you plant an Aerogarden Pro 100? The pods come in the container in the order where you should place them into the garden. Place the pods and add water to the indicator line within the bowl. At this point I start the water running in the bowl by plugging it in, and getting the sponges completely wet. Then I add the nutrient packages according to the directions that come in the seed kits.

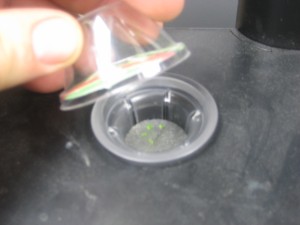
Aerogarden Sponge Analyzing the pods closer you can see it is some kind of sponge that contains the seeds inside. (If you know the exact Top of Aerogarden Spongeterminology for the sponge please feel free to comment below.) Inside is harbored the seeds which if you’ve taken all the proper measures should begin to sprout. If the seeds do not sprout for whatever reason, be sure to call Aerogarden as soon as you begin to notice the lack of sprouting. (They are guaranteed to grow, and I’ve read other people’s blogs whereby they’ve received their replacement seeds absolutely free!)

Aerogarden Sprouts I couldn’t believe how excited I got when I saw this little guys begin to sprout. It was the first sign of life and the first sign of victory! The really fun thing is it happened over night! Literally!

Soon, one by one they began showing their delicate little heads. Now, these are pictures of the herbs we planted from the secondMore Seedlings Aerogarden. (To be referred to from here on out as AG2) This is the current status of the sprouts for AG2.

We planted the Lettuce last Friday. That means from it took Saturday, Sunday, and late in the evening monday to finally see some Aerogarden Lettuce Sproutsgreat sprouts like this. It said on the package that it would begin to sprout in 1-3 days and I can say that now I’m a believer. Anyway, this post is titled The First Aerogarden Problem, so maybe we should begin talking about that.

So like I said we had purchased the lettuce greens for the Aerogarden 6 when we ended up purchasing an Aerogarden Pro 100. Number 6 space saver is designed a little taller and a little more narrow. So when I had attempted to insert the Pods for myAerogarden Problem lettuce it wouldn’t fit on the sides because the pods for the 6 reached farther than the pro 100. The bottom of the pod was bumping the side and bottom of the bowl. The second issue was the placement of the support beams inside the bowl were blocking the other pods from resting comfortably in place. So, not knowing the purpose of those supports I removed them to allow the pods to sit properly. I was worried about this setup at first, but I am happy to report that every single one of my lettuce plants is off to a good start.

Aerogarden Stand I’d like to discuss the stand in greater detail later because it is such a cool thing. But it requires a little bit of forethought before permanently mounting it to any walls.

If you have an Aerogarden Life Lesson that you would like to share. I know that I would appreciate to hear your stories and learn from someone a little more savvy about this than I. Please leave you comments below.

Newbie Aerogardener

Hello all, my name is Chris and I’m a newbie areogardner.  If you are anything like me you probably are searching out questions like,

What is an Aerogarden?

How does the Aerogarden work?

How much does an Aerogarden Cost?

What are the cost saving to buying an Aerogarden?

I’m really excited to learn more about the Aerogarden as I think that it is an amazing concept.  I started this blog a little bit late as I have already purchased and planted my Aerogardens.  From here on out I hope to explore this fascinating new world of hydroponics and countertop gardening with you.

I’ve enjoyed traditional gardening for many years, and I can honestly say I really enjoy the cultivating of life.  I find it quite therapeutic being out in the sunshine and planting, weeding, feeding and harvesting (especially harvesting).  We’ve grown lettuce, carrots, onions, green onions, bell peppers, broccoli, Cucumbers, tomatoes, corn, and herbs.  Our first few years in this arena we failed miserably.  If we yielded any crop at all it was far less than picture perfect.  Our broccoli turned out okay and our tomatoes thrived.  We enjoyed onions, and a couple of small cucumbers, but we found that just about everything else wouldn’t grow, or wouldn’t grow well.

The first thing we decided to research was the soil.  The soil we had in our backyard was very bad for gardening.  We tilled the soil and planted our seeds.  This was before we learned about starting the seeds indoors LOL. Some seeds took others didn’t.  After tilling we thought our soil was great.  We threw a couple of handfuls of Walmart bought fertilizer and called it good.  We didn’t educate ourselves when to harvest, when to plant, how to space the plants, when to water, or anything related to harvesting.  Our carrots grew short and stubby.  Our lettuce grew small and bitter.  Our corn barely grew at all.  This was a frustrating experience.  So we decided to educate ourselves.

We learned that our soil had way too much clay in it.  Automatically I almost ran out and grabbed bags of sand to mix in, but that wasn’t being very educated. So we turned to the internet.  We learned that organic compost was the best method .  You can over sand the soil, but you can plant directly into compost.  After learning about the benefits of compost, I ran out and got 9 pallets and built them into a compost bin.  I’ll cover this in greater detail later.  I also bought compost from the city’s green wast division, built garden boxes and have been growing great greens ever since.

One day when I was looking up the details about how to grow garlic I stumbled upon the concept of the Aerogarden!  I fell in love at first glance.  I ordered 2 right away and purchased a three shelf Aerogarden stand to go with it.

Now you are caught up with my little back story I hope to be able to share my experiences, triumphs, mistakes, and stories with you on this journey.

– Chris the Newbie Aerogardener

If you are an Aerogarden Enthusiast, leave your story in the comments below.  I’d love to learn from you too!